Running optimization
When stocks, parts, and cutting settings are ready, press F3 or choose File > Start optimization. The program switches to the Results tab and displays progress and the best solution found so far.
You can optimize several plans together by selecting them on the Plans tab before starting optimization. Each plan is calculated for its own material and settings.
Results tab
The Layouts list shows the layouts generated by optimization. Selecting a layout displays its cutting arrangement, including parts, trims, and reusable remnants.
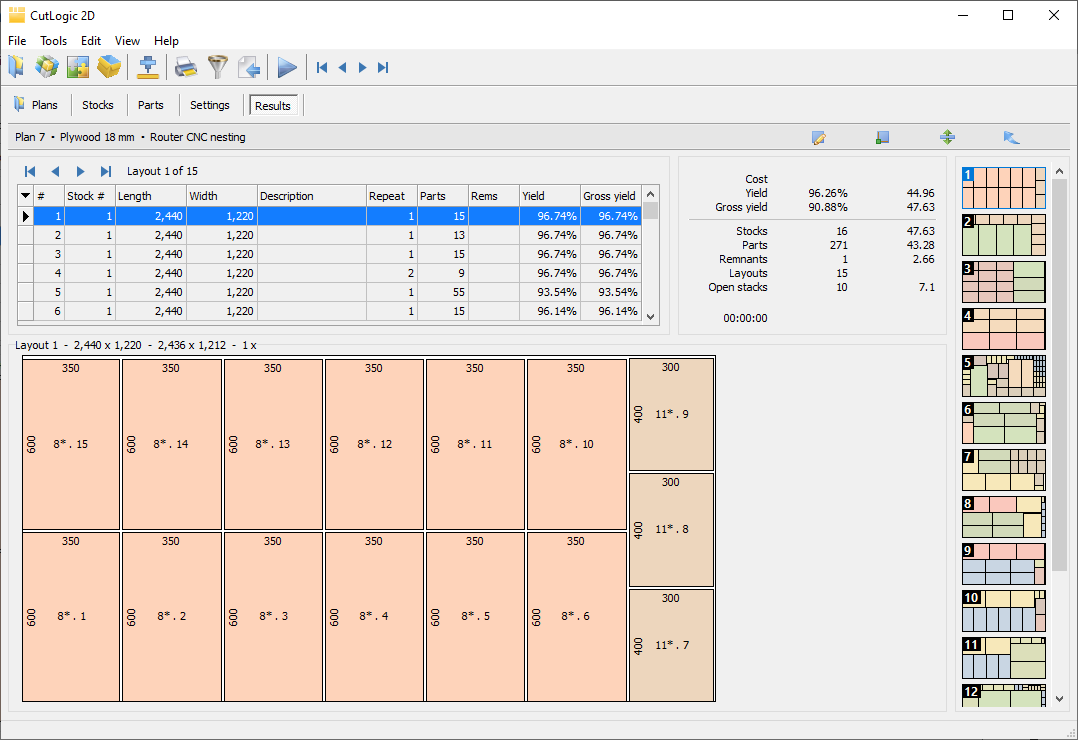
The summary shows overall yield, cost, material use, and other results:
▪Cost - Calculated total stock cost of the cutting plan
▪Yield - Material utilization calculated with produced reusable remnants
▪Gross yield - Material utilization calculated without produced reusable remnants
▪Stocks - Number and total area of used stock pieces
▪Parts - Number and total area of cut parts
▪Remnants - Number and total area of reusable remnants produced, excluding newly created roll remnants
▪Layouts - Number of cutting layouts in the result
▪Uncut parts - Number and total area of parts not included in the optimized layouts
▪Open stacks - Maximum and average number of open part size stacks during cutting
Click a part or remnant in the graphical layout to inspect its position and dimensions, as well as edge banding information for parts.
For guillotine cutting, the cut-navigation controls let you step through individual cuts; the selected cut is highlighted in red.
The Results toolbar also provides layout display options, including switching the layout origin, stretching the drawing, and maximizing the drawing area.
Double-clicking a part or remnant can open its associated label report, depending on the configured reports. For printable cutting layouts and labels, see Reports. For machine output, see CNC Machines and G-code and Export.
Manual layout editing
After optimization, you can adjust a cutting layout manually when a particular production arrangement is preferred.
In the Results tab, click Start manual layout editing. The toolbar changes to indicate editing mode. Drag a part to another position in the layout or into the Uncut parts list if you do not want it cut in the current layout. To rotate a part while dragging it, hold Ctrl.
Manual editing is intended for adjustments to an optimized result. If the required changes are extensive, modifying the input data or cutting settings and running optimization again may be more practical.